
How to onboard consumers and businesses as your customers within your application, with Striga doing all the heavy lifting behind the scenes w.r.t compliance, legal and onboarding.
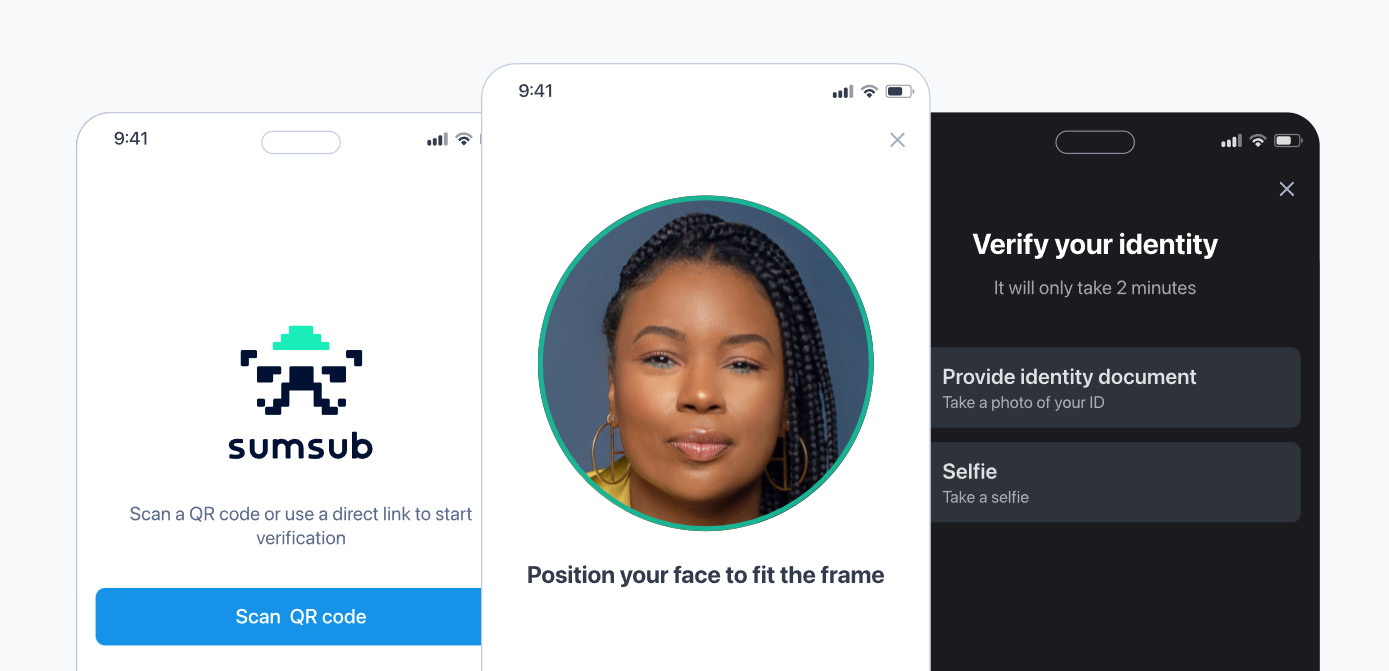
Striga utilizes SumSub to handle consumer and business onboarding. SumSub is chosen as a verification vendor by Striga due to it's incredibly powerful set of flow customization features. Striga's internal compliance & legal teams constantly monitor for changes in legislations/requirements/sanction etc. and configure the SumSub workflows internally such that your application always remains compliant and onboards users in accordance with the latest applicable rules and regulations.
Your application simply plugs in a token retrieved from Striga's API into the SumSub SDK embedded within your user interface and the SumSub SDK directs the user through their pre-configured workflow automatically with no intervention required on your side, thereby keeping you entirely out of scope of licensing since your application and your company is not privy to any sensitive information and is additionally not performing any compliance/legal duties.
SumSub provides developer friendly SDKs to integrate the entire lifecycle of verification into your workflow, with your branding and conforming to your tech stack with SDKs available for mobile and web applications.
SumSub Mobile SDK Sample

SumSub Web SDK Sample
To make integration easier, here is a short demo that consumes a SumSub token generated by Striga's API and SumSub's Web SDK - Please insert your own SumSub token generated from the "Start KYC" or "Start KYB" API endpoints in the Codepen example as these tokens have a short expiry.
WebSDK 1.0 DeprecationStarting June 1, 2025, the old version of the SumSub WebSDK will be discontinued, and no longer be available for use. We recommend that you migrate to the new WebSDK 2.0 version as soon as possible to ensure minimal disruption to your operations.
The new WebSDK offers the same capabilities as the old version but with an improved UI and verification flow. Additionally, it's much easier to customize the look and feel of the WebSDK to match your branding. The best part is that you won't need any CSS knowledge or design experience to do so.
Please refer to this migration document for a step by step guide on migrating from WebSDK 1.0 to 2.0
Note: WebSDK 2.0 offers customization options within the SumSub dashboard that Striga's compliance team utilizes. Currently we cannot offer any customization possibilities on a per application basis since the compliance workflow encompasses all possible cases of user verification journeys and a CSS customization would cause multiple duplications of this workflow leading to increased failure rates. We are however working on an approach to allow specific CSS customizations and will duly send out a notice when available.